A WebRTC softphone that logs calls into ClickUp. Agents dial from the softphone, talk in the browser, and each completed call becomes a ClickUp task carrying the CDR and a playable recording link. Source code: vobiz-ai/Vobiz-ClickUp-Calling — the softphone, the Node backend that answers Vobiz webhooks, and the scripts that provision Vobiz and backfill CDRs.
Scope: inbound and outbound, with browser audio over WebRTC. npm test runs 63 assertions across the call flows, the ClickUp task shape and a security-regression group. A live call has not been run since the 2.0.0 security rewrite, so verify both directions on your own account before rolling it out.
This is a page you open beside ClickUp, not a ClickUp extension. ClickUp is written through its REST API with a personal token — there is no OAuth app, no iframe, and no command-centre entry. If you need a listable App Directory app, that gap is the work.

What you get

How it works

The one thing to understand first: the browser is the A leg. The softphone sends the SIP INVITE itself, and the backend answers <Dial><Number> to reach the customer.
Build it this way round. Originating to the customer over the REST API first and then bridging the agent in with <Dial><User> does not work for a registered WebRTC endpoint — the customer answers, hears ringback, and then “the agent could not be reached”.Inbound is the exception: <Dial><User> is the only way to reach a registered endpoint, and it works today.

Requirements

Step 1: Prove the Vobiz account

Place a call with rtc-demo.vobiz.ai. If that fails, nothing here will work and you will debug the wrong layer for a day.

Step 2: Provision Vobiz

This creates the Vobiz application and the SIP endpoint the softphone registers as. To do it by hand, create the endpoint first:
Vobiz rewrites the username you submit. Send cuagent and the stored username comes back as something like cuagent1187694299145202883643. Read the stored username out of the response — that is what registers, and what VOBIZ_SIP_USER must contain.

Step 3: Run the backend

cloudflared must be on your PATH (brew install cloudflared, or winget install --id Cloudflare.cloudflared -e). The binary is deliberately not committed. The .env values that matter:
CLICKUP_API_TOKEN is a personal token carrying its owner’s full ClickUp access — every space that user can see. Treat it as a high-value credential and scope the account accordingly.
Then verify before opening the softphone:
The second must return <Response> containing <Dial …><Number>. Anything else — a tunnel error page, an ngrok interstitial — and every call dies silently.

Step 4: Sign in and call

Open http://localhost:8092/ for the softphone. While it is registering, the badge reads CONNECTING.
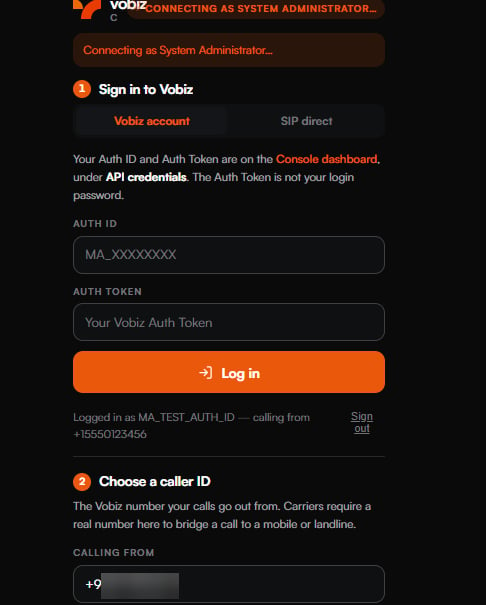
Vobiz Calling for ClickUp panel showing a CONNECTING AS SYSTEM ADMINISTRATOR badge, the Vobiz account and SIP direct tabs, and empty Auth ID and Auth Token fields

The softphone while it registers.

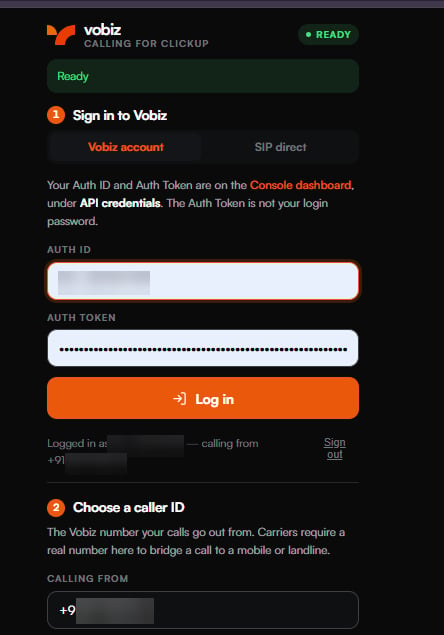
Sign in with the Auth ID and Auth Token from the console under API credentials — or switch to SIP direct for an endpoint username, password and caller ID. Allow the microphone. The badge turns green when JsSIP has registered.
The panel showing a green READY badge, a Ready banner, the filled Auth ID and masked Auth Token, and a Logged in as line showing the redacted account ID and calling-from number

Registered and ready to dial.

Wait for the status to read Ready before dialling. That is the SIP registration landing; dialling before it rings the customer into silence.

Choose a caller ID

Calling from lists the numbers on the account. Carriers require a real number here to bridge a call to a mobile or landline.
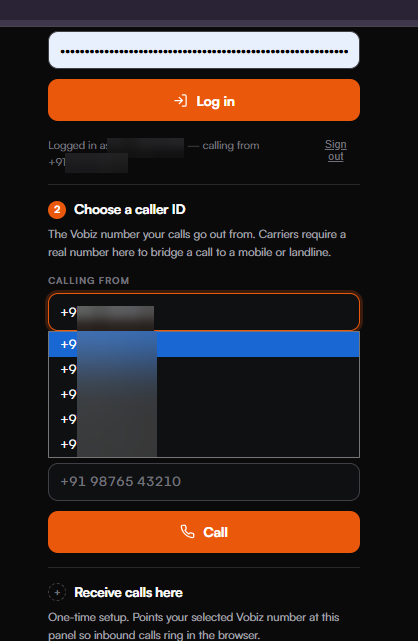
The Calling from field expanded into a dropdown of five Vobiz numbers with the first highlighted, above the number-to-call field and a Call button

Selecting the outbound caller ID.

Place the call

Type a number in E.164 format, or click any phone number in ClickUp and the panel dials it for you.
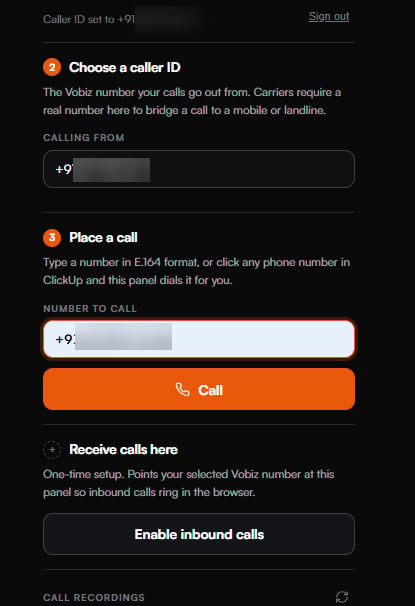
The Place a call step with a destination number typed into the Number to call field, an orange Call button, and the Receive calls here one-time setup below

A destination entered, ready to dial.

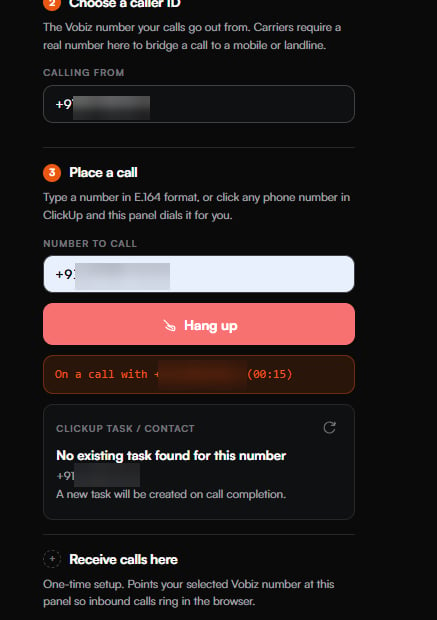
Once connected the panel shows the timer and, underneath, the ClickUp task / contact card — the task this call will be filed against, or notice that a new one will be created on hangup.
Live call view showing a red Hang up button, an On a call with banner carrying a running timer, and a ClickUp task slash contact card reading No existing task found for this number with the note that a new task will be created on call completion

An active call, with the ClickUp task card below it.

Inbound calls

Receive calls here is the one-time setup that points your selected Vobiz number at this panel. After that, a call to the DID raises an in-panel prompt — Enter accepts, Escape declines.
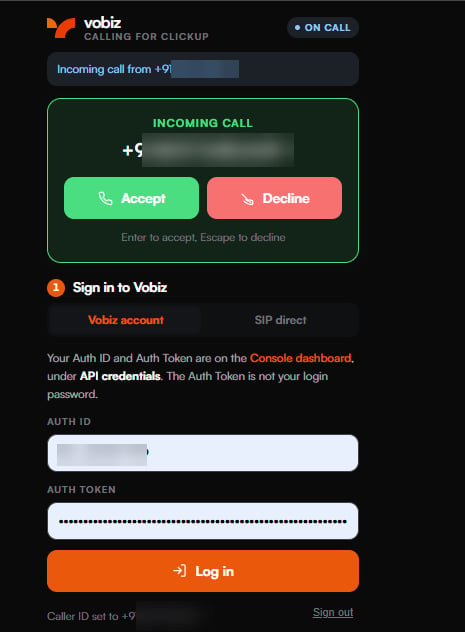
The panel with an ON CALL badge and a green incoming-call card showing the calling number with Accept and Decline buttons and the hint Enter to accept, Escape to decline

The inbound prompt, with keyboard shortcuts.

The completed call is logged the same way as an outbound one.

Recordings

Completed calls appear under Call recordings, each with an inline player.
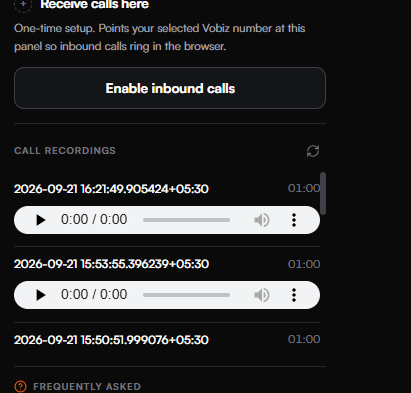
The Call recordings section listing timestamped entries with durations, two of them expanded into inline audio players, below the Enable inbound calls button

Recordings, with inline players.

What lands in ClickUp

One task per call, in CLICKUP_LIST_ID:
The playback link expires (RECORDING_URL_TTL_SECONDS, 900 seconds by default), so a task read later shows a dead link rather than a permanent one. That is deliberate: these tasks are readable by everyone in the ClickUp space.
Without CLICKUP_API_TOKEN the backend logs the task it would have created and returns simulated: true. It never pretends the write happened.

Reading the logs

DialBLegUUID is the single most useful field in this stack. Present means the call connected. Empty means no B leg was ever created, whatever the UI said.

Backend routes

Troubleshooting

Testing

The test:* scripts drive a backend you started, sign in with the credentials in backend/.env, and fail the process when something is wrong.

Next steps