

URL
The Applications list
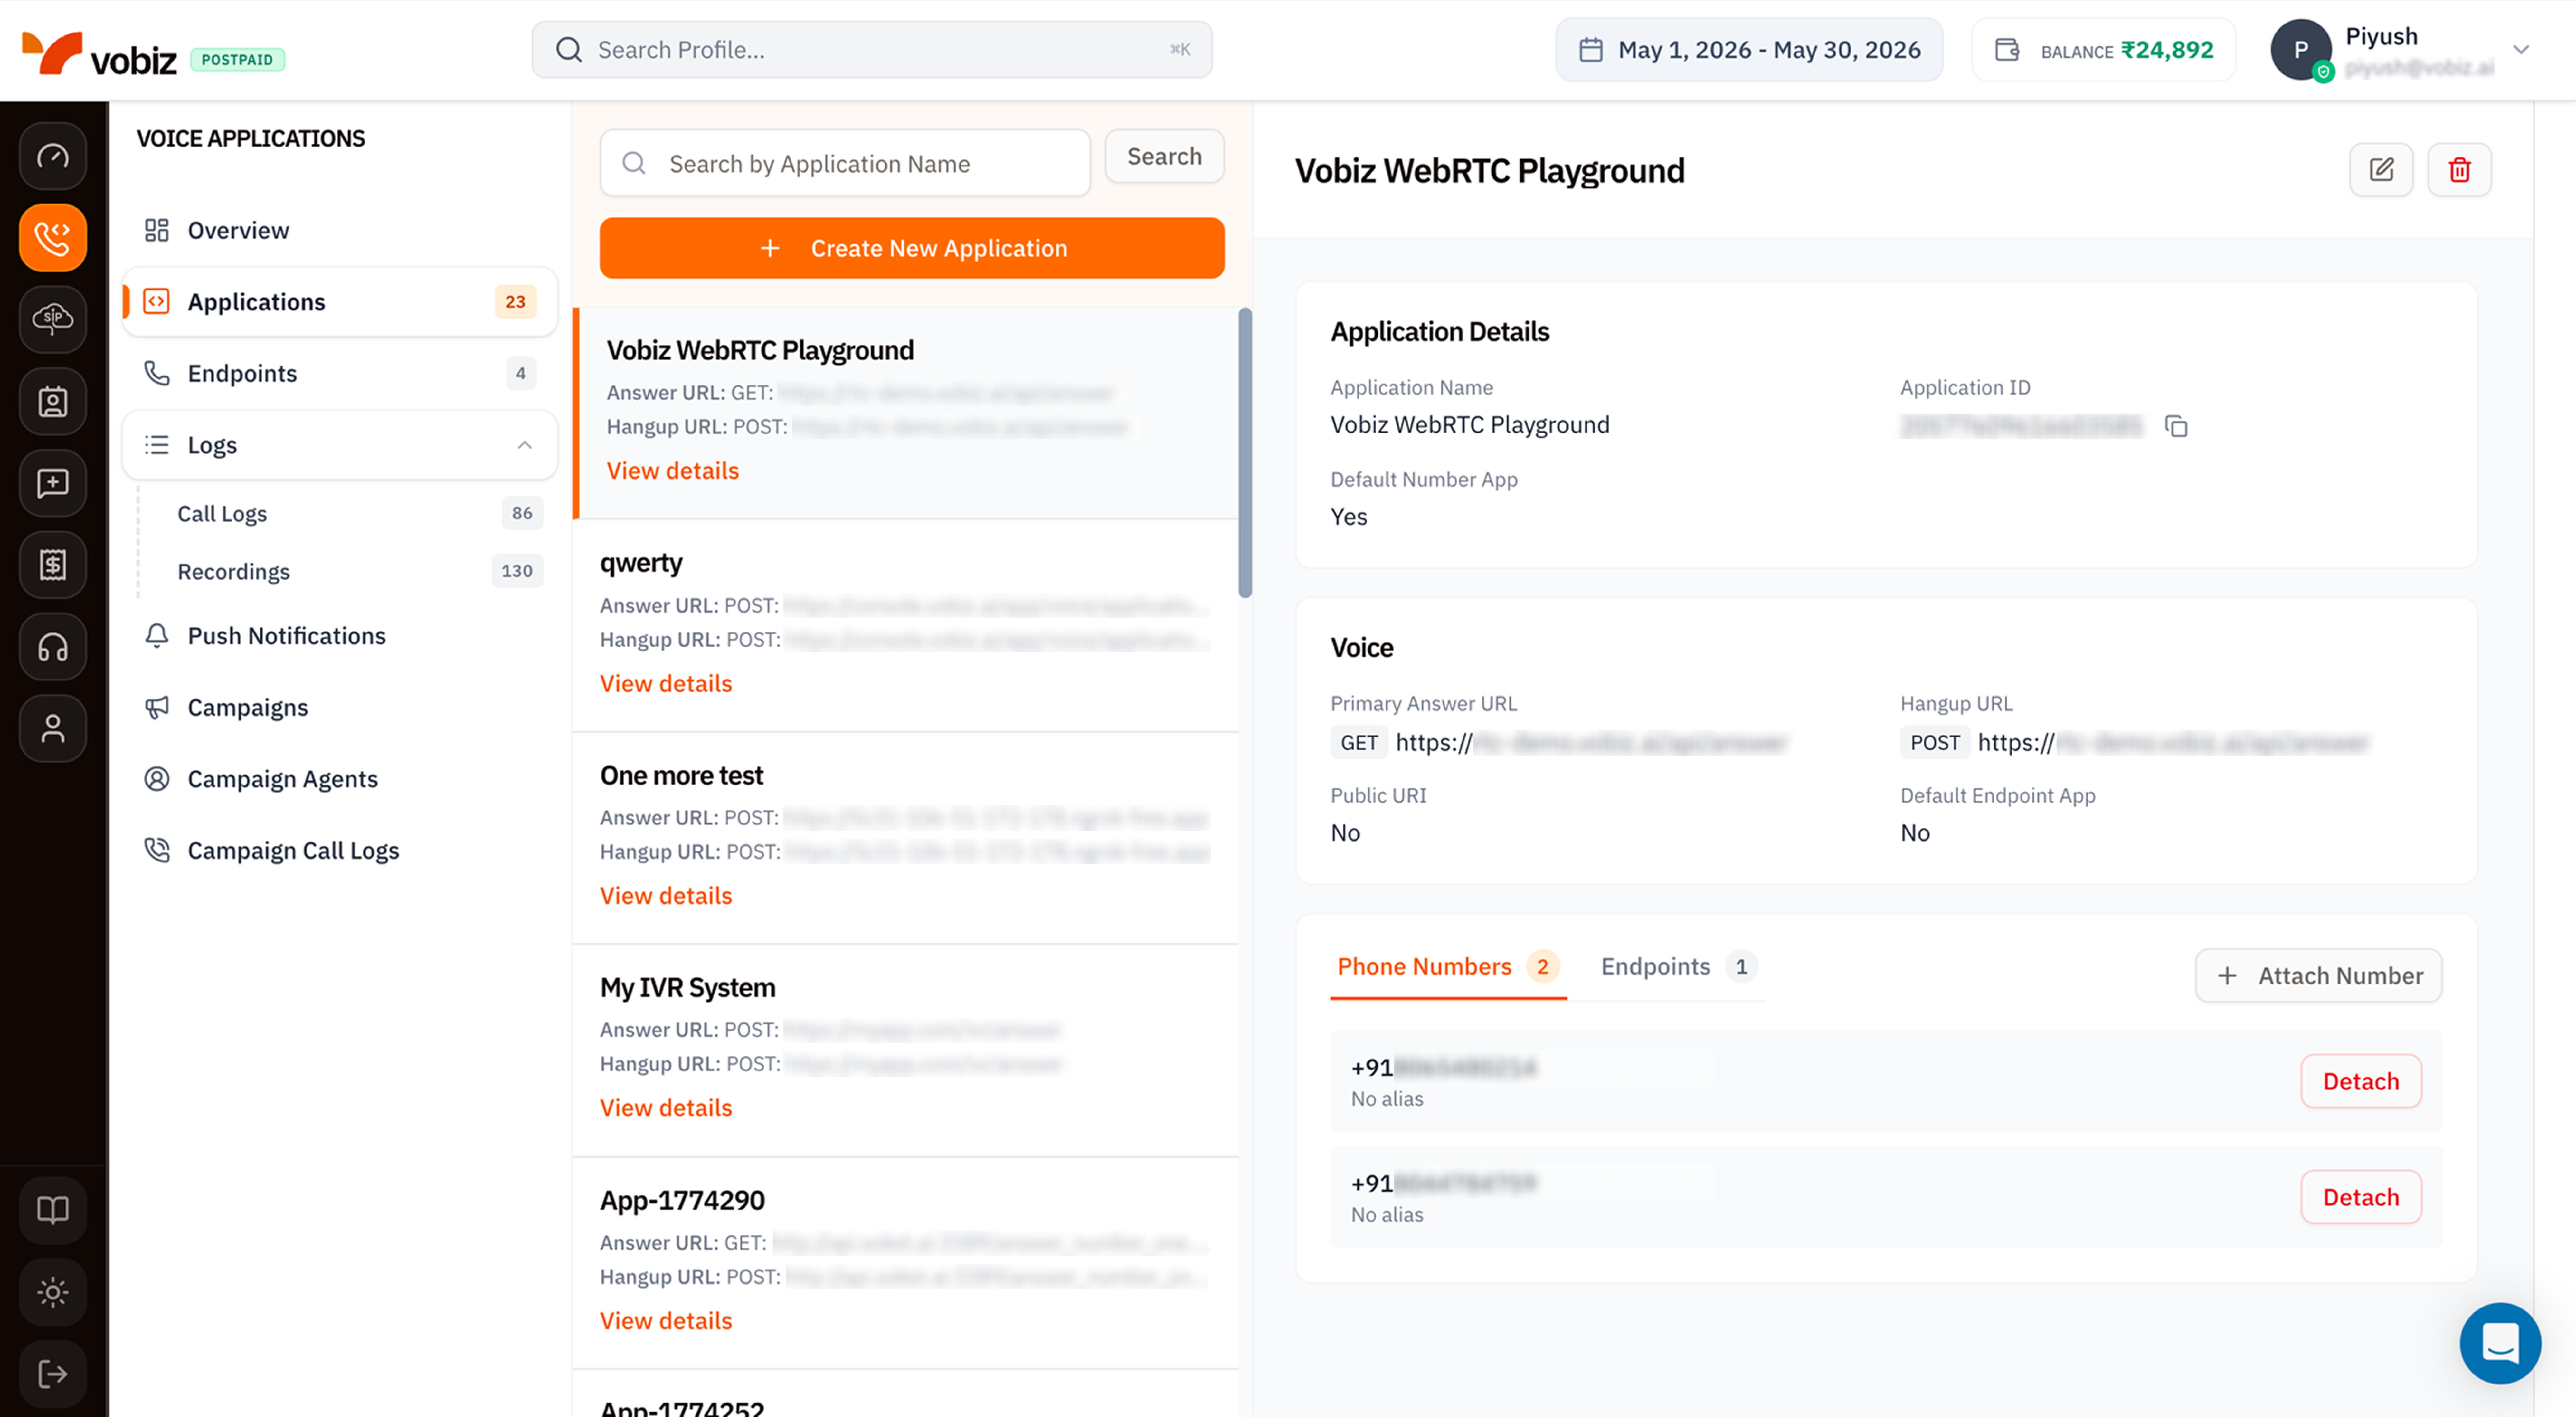
Voice Applications - Applications
- Search + Create - filter the list by name, or click + Create New Application to open the creation form.
- App list - every app on your account. Each card shows the Answer URL, Hangup URL, and a View details link.
- Application Details panel - the right side updates when you click a card.
What the details panel shows
Below the details, two tabs:
- Phone Numbers - every DID attached to this application. Click + Attach Number to add more, or Detach to release one.
- Endpoints - SIP endpoints (softphone logins) routed to this application.
Create an XML Application
Click + Create New Application to open the side panel.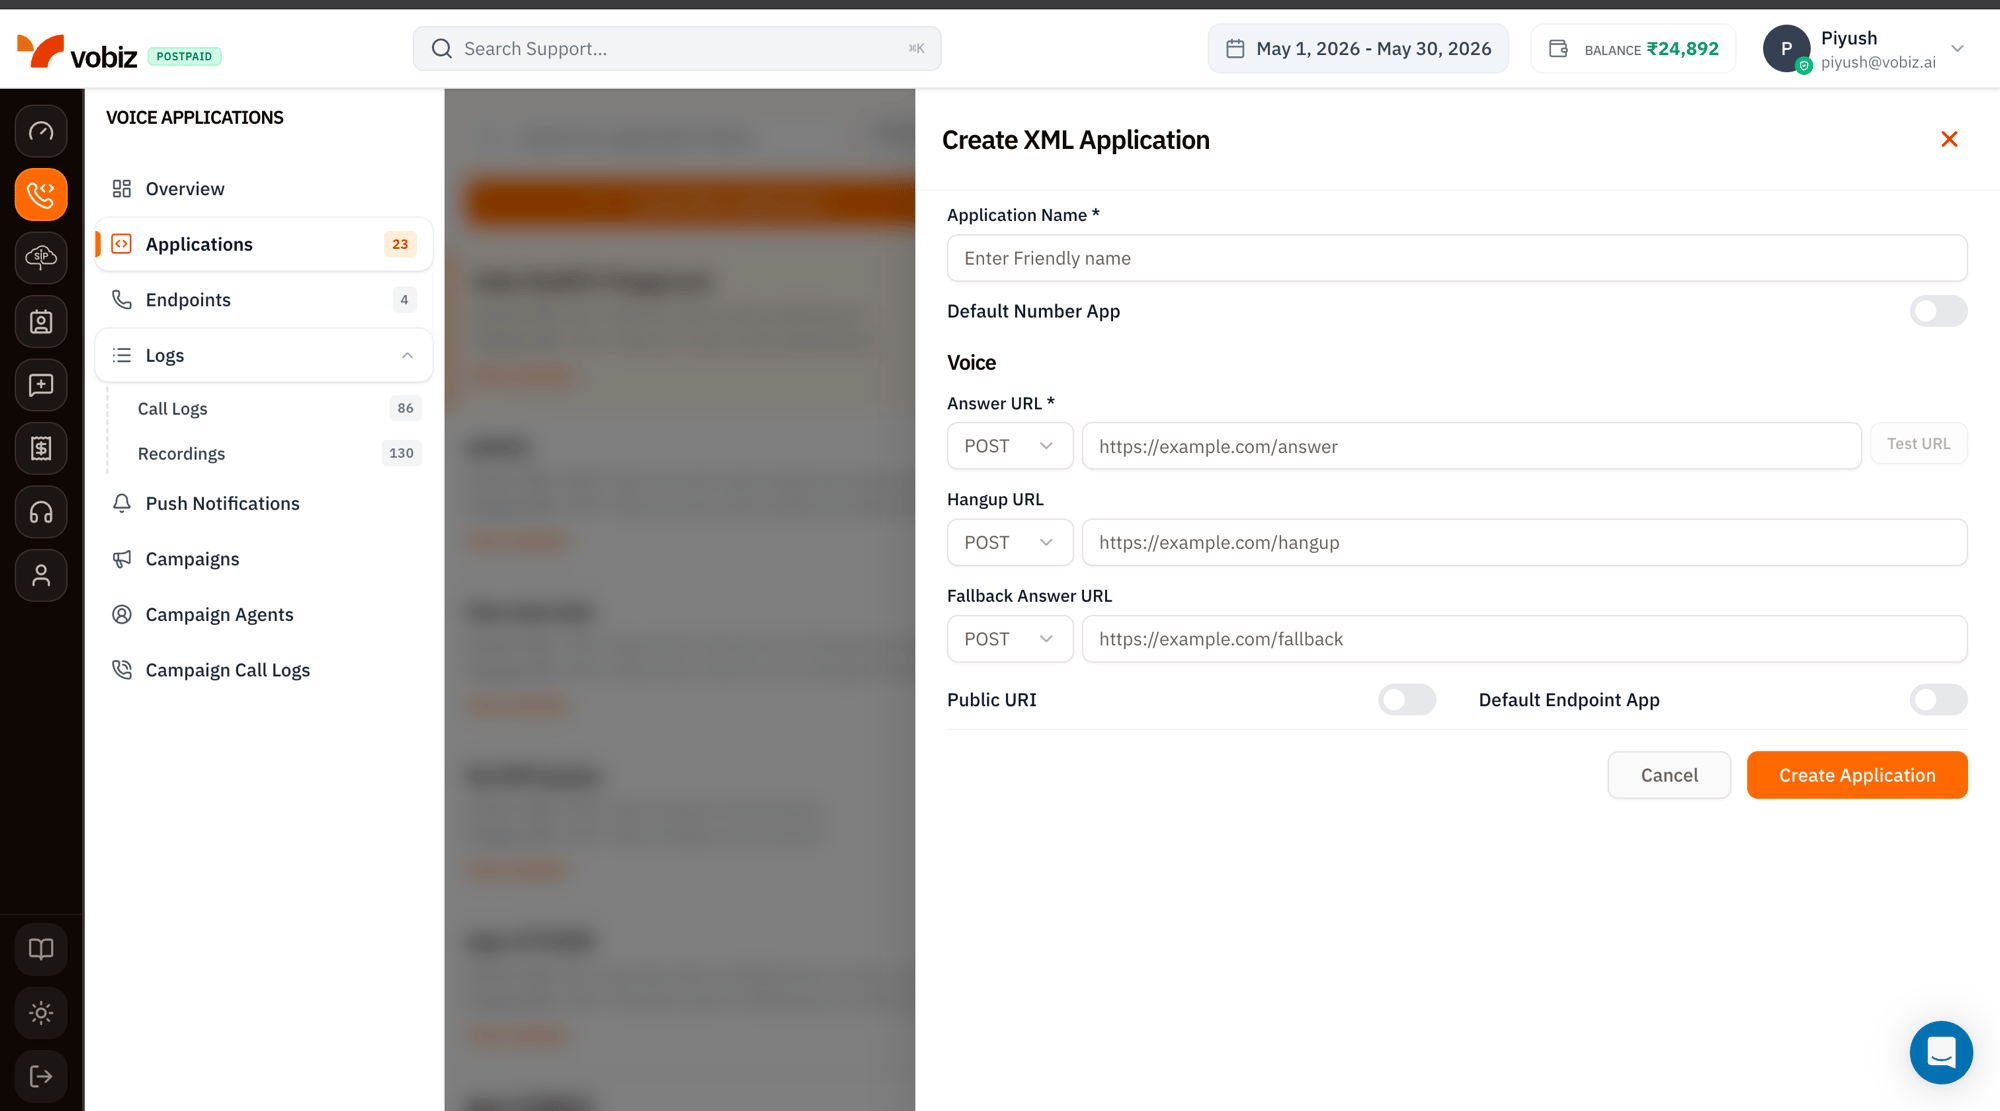
Create XML Application form
Generate the XML body your webhook returns with the interactive XML Builder, or hand‑roll it using the XML overview.
Attach phone numbers
The final step of the create flow (and a separate + Attach Number action on existing apps) opens the Attach Phone Numbers to Application view.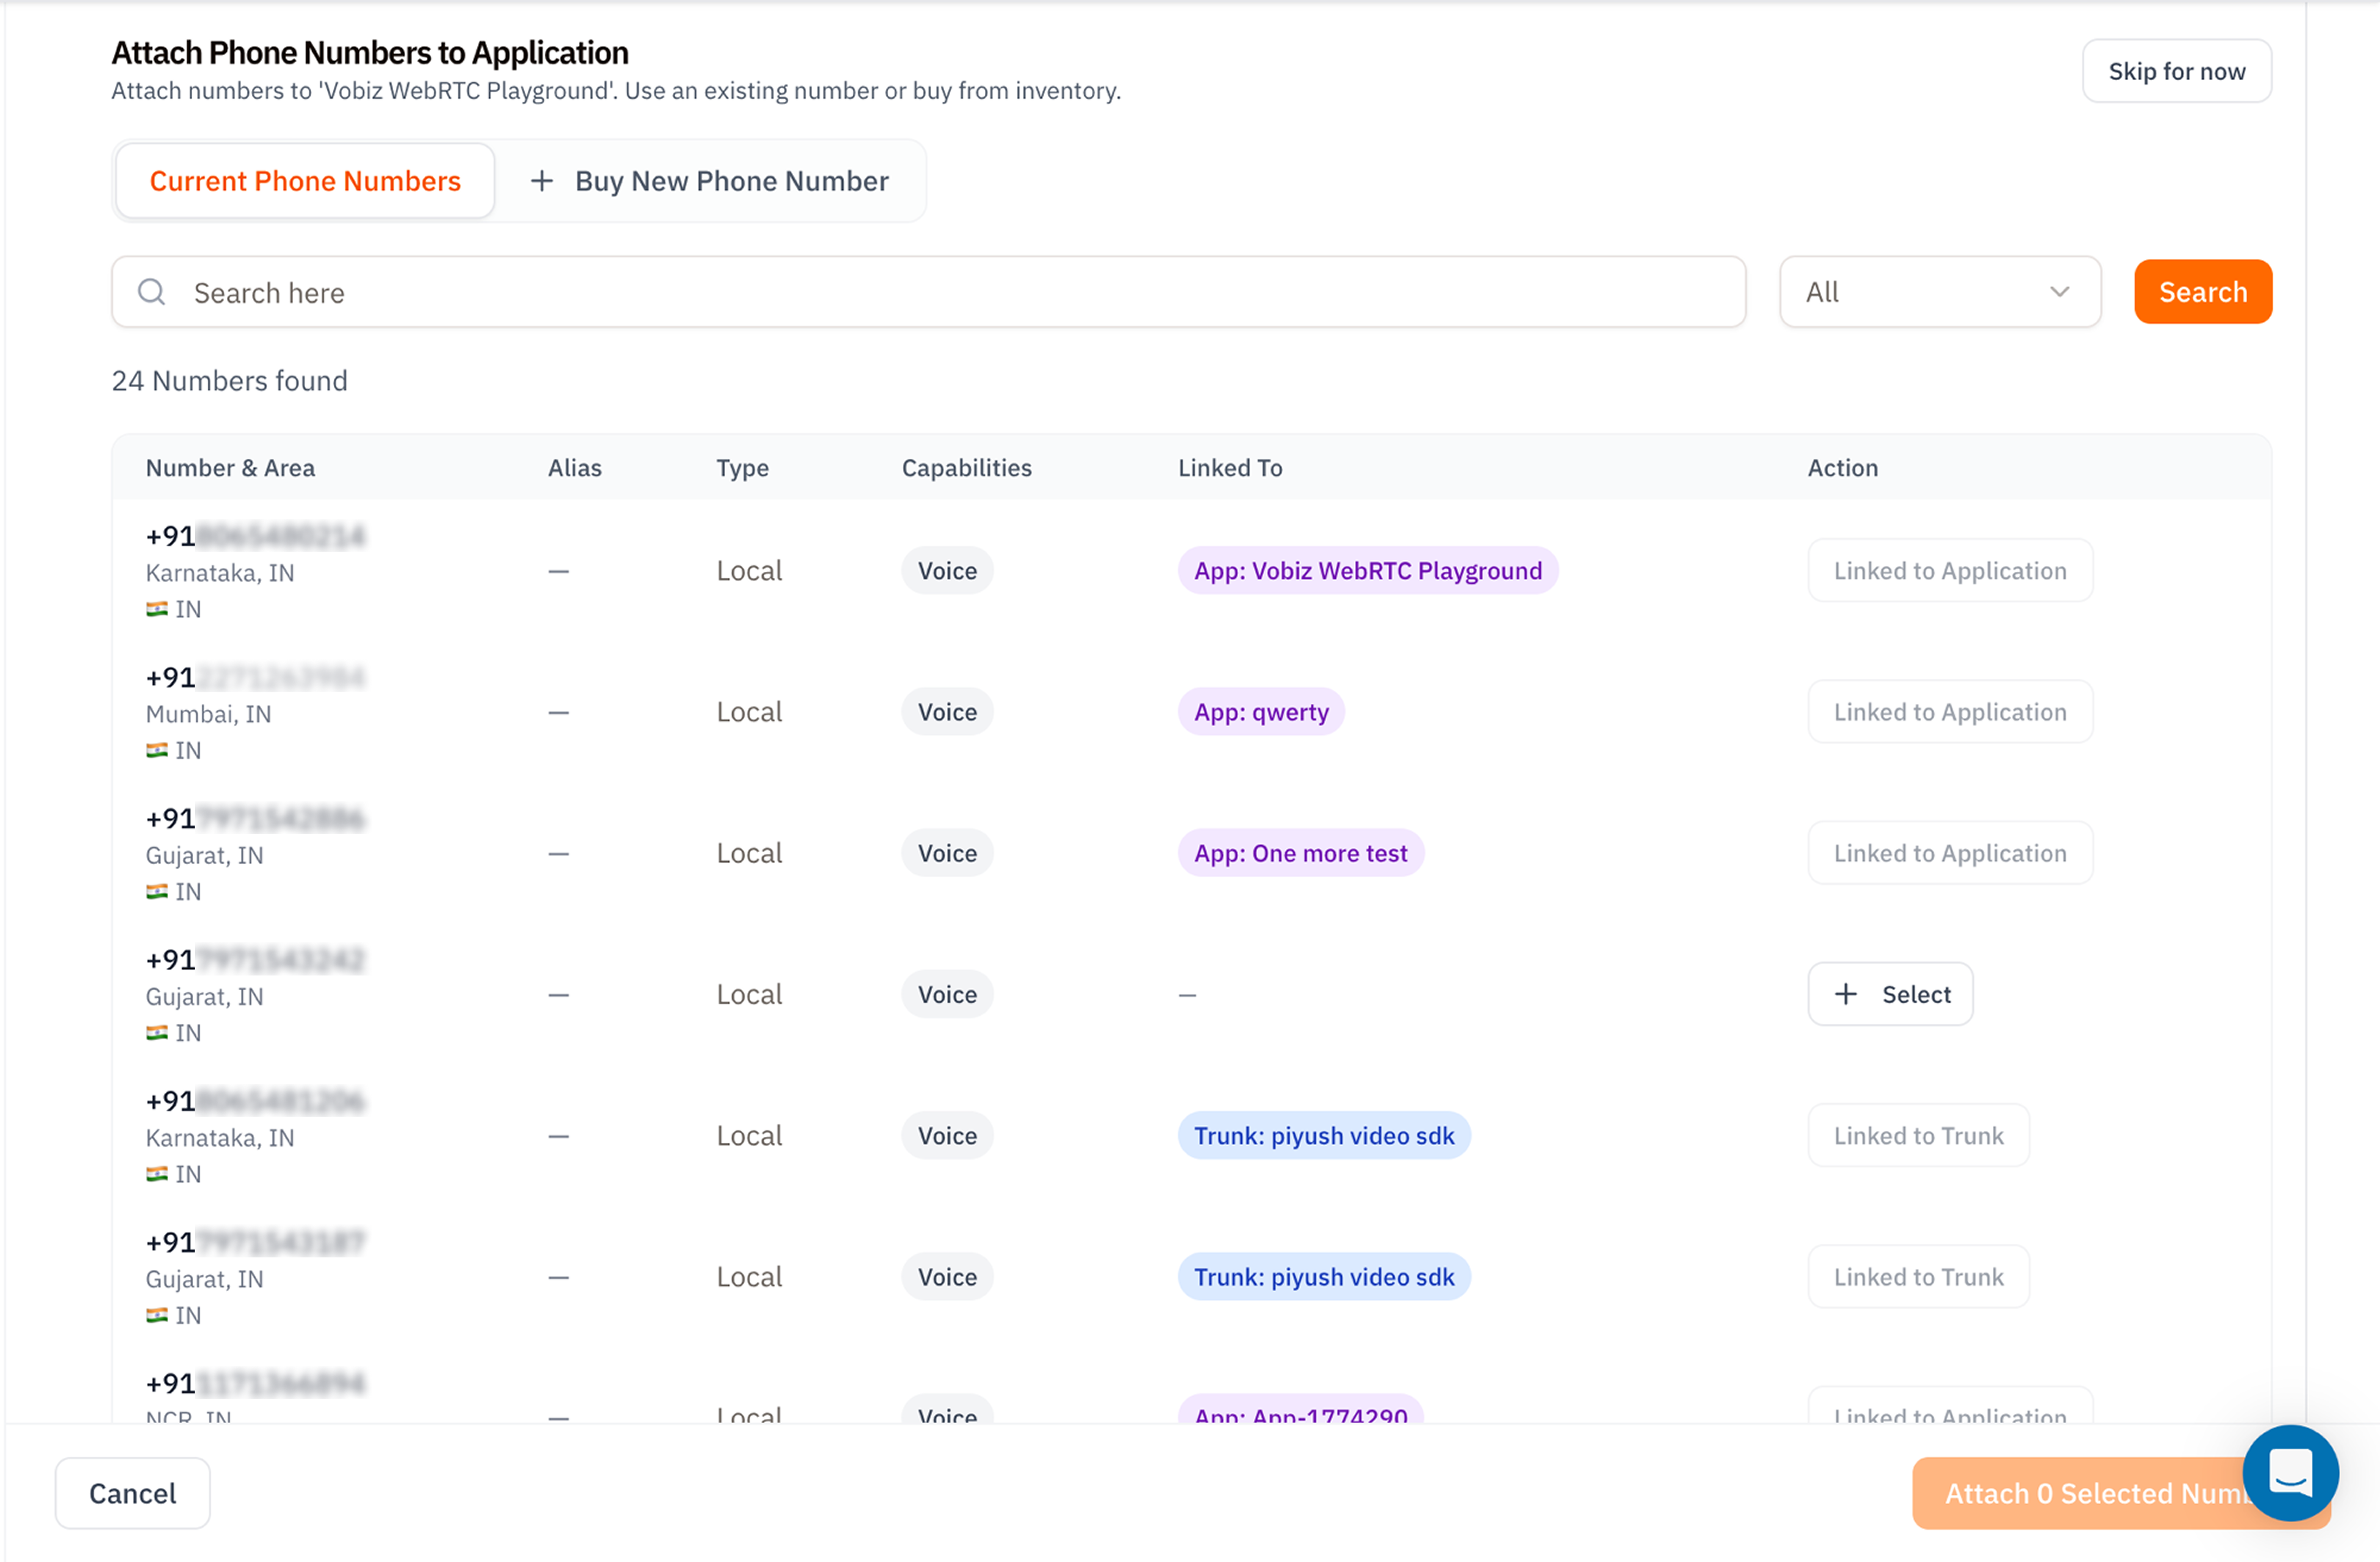
Attach Phone Numbers modal
- Current Phone Numbers - every DID on your account. The Linked To column shows where each number is currently routed (another App, a Trunk, or unassigned). Only numbers with no link or those linked to this app can be selected.
- Buy New Phone Number - opens the DID purchase flow without leaving this dialog.
Edit, delete, and disable
The two icons in the top‑right of the details panel:- ✏ Edit - opens the same form you used to create the app. URLs, name, and toggles can all change.
- 🗑 Delete - permanently removes the app. Any attached numbers fall back to the default number app (or stop receiving calls if no default is set).
Tips
- Keep one Default Number App that points to a small “this number is unconfigured” handler - newly purchased numbers will route there until you wire them up.
- Use a Fallback Answer URL in production. A 502 from your primary handler is rare, but when it happens you want graceful XML, not a SIP error.
- The Application ID is the canonical handle for API access - store it in your
.envrather than the name.
What’s next
SIP Endpoints
Sign softphones into your app for click‑to‑call testing.
XML Reference
Every supported XML verb with examples.