Sarvam integration
Take a Sarvam Samvaad voice agent live on a real phone number in minutes - Vobiz powers the Rent from Sarvam telephony option, so you complete KYC, buy an Indian number, and launch outbound campaigns or inbound deployments without leaving the Sarvam platform.
Sarvam AI builds India-first speech and language models. Its Samvaad platform lets you design, test, and deploy voice agents - and Vobiz powers the telephony underneath, so your agent can answer and place real phone calls.
What you'll build
A Sarvam voice agent live on an Indian phone number, handling outbound campaigns and inbound calls. Everything happens inside the Sarvam platform: number provisioning, KYC, and call delivery all run on Vobiz behind the scenes.
ℹ️ Note: No separate Vobiz account, API keys, or SIP configuration required. On the Rent from Sarvam path, Vobiz is embedded in the Sarvam platform. Numbers are billed through your Sarvam Credits, and the only Vobiz screen you see is the hosted KYC flow that Indian regulation requires.
Two ways to get telephony
Sarvam offers two telephony paths, and Vobiz supports both.
| Rent from Sarvam | Bring your own telephony | |
|---|---|---|
| Powered by | Vobiz, embedded | Your own provider account (Vobiz is one of the supported options) |
| Number provisioning | Buy inside Sarvam, one number at a time | Import numbers you already own |
| Billing | Sarvam Credits | Directly with your provider |
| Setup time | About 2 minutes plus KYC | Instant once credentials are added |
| Best for | Starting fresh, or wanting one bill | Existing numbers, rates, or trunk setup you want to keep |
This guide walks through Rent from Sarvam end to end, then covers connecting a Vobiz account you already have.
Prerequisites
- Sarvam account → Sign up at platform.sarvam.ai
- Sarvam Credits on your account, enough to cover the number's monthly fee
- KYC documents for an Indian phone number - PAN plus Aadhaar if you're an individual, or company PAN plus GST if you're a business
Step-by-step setup
Build a voice agent
Log in to the Sarvam platform and open the Voice Agents section from the left rail.
Under Build, go to Agents and create your agent - prompt, voice, language, and any knowledge base it should draw on. Once it's ready, the home screen shows Your agent is ready to deploy.
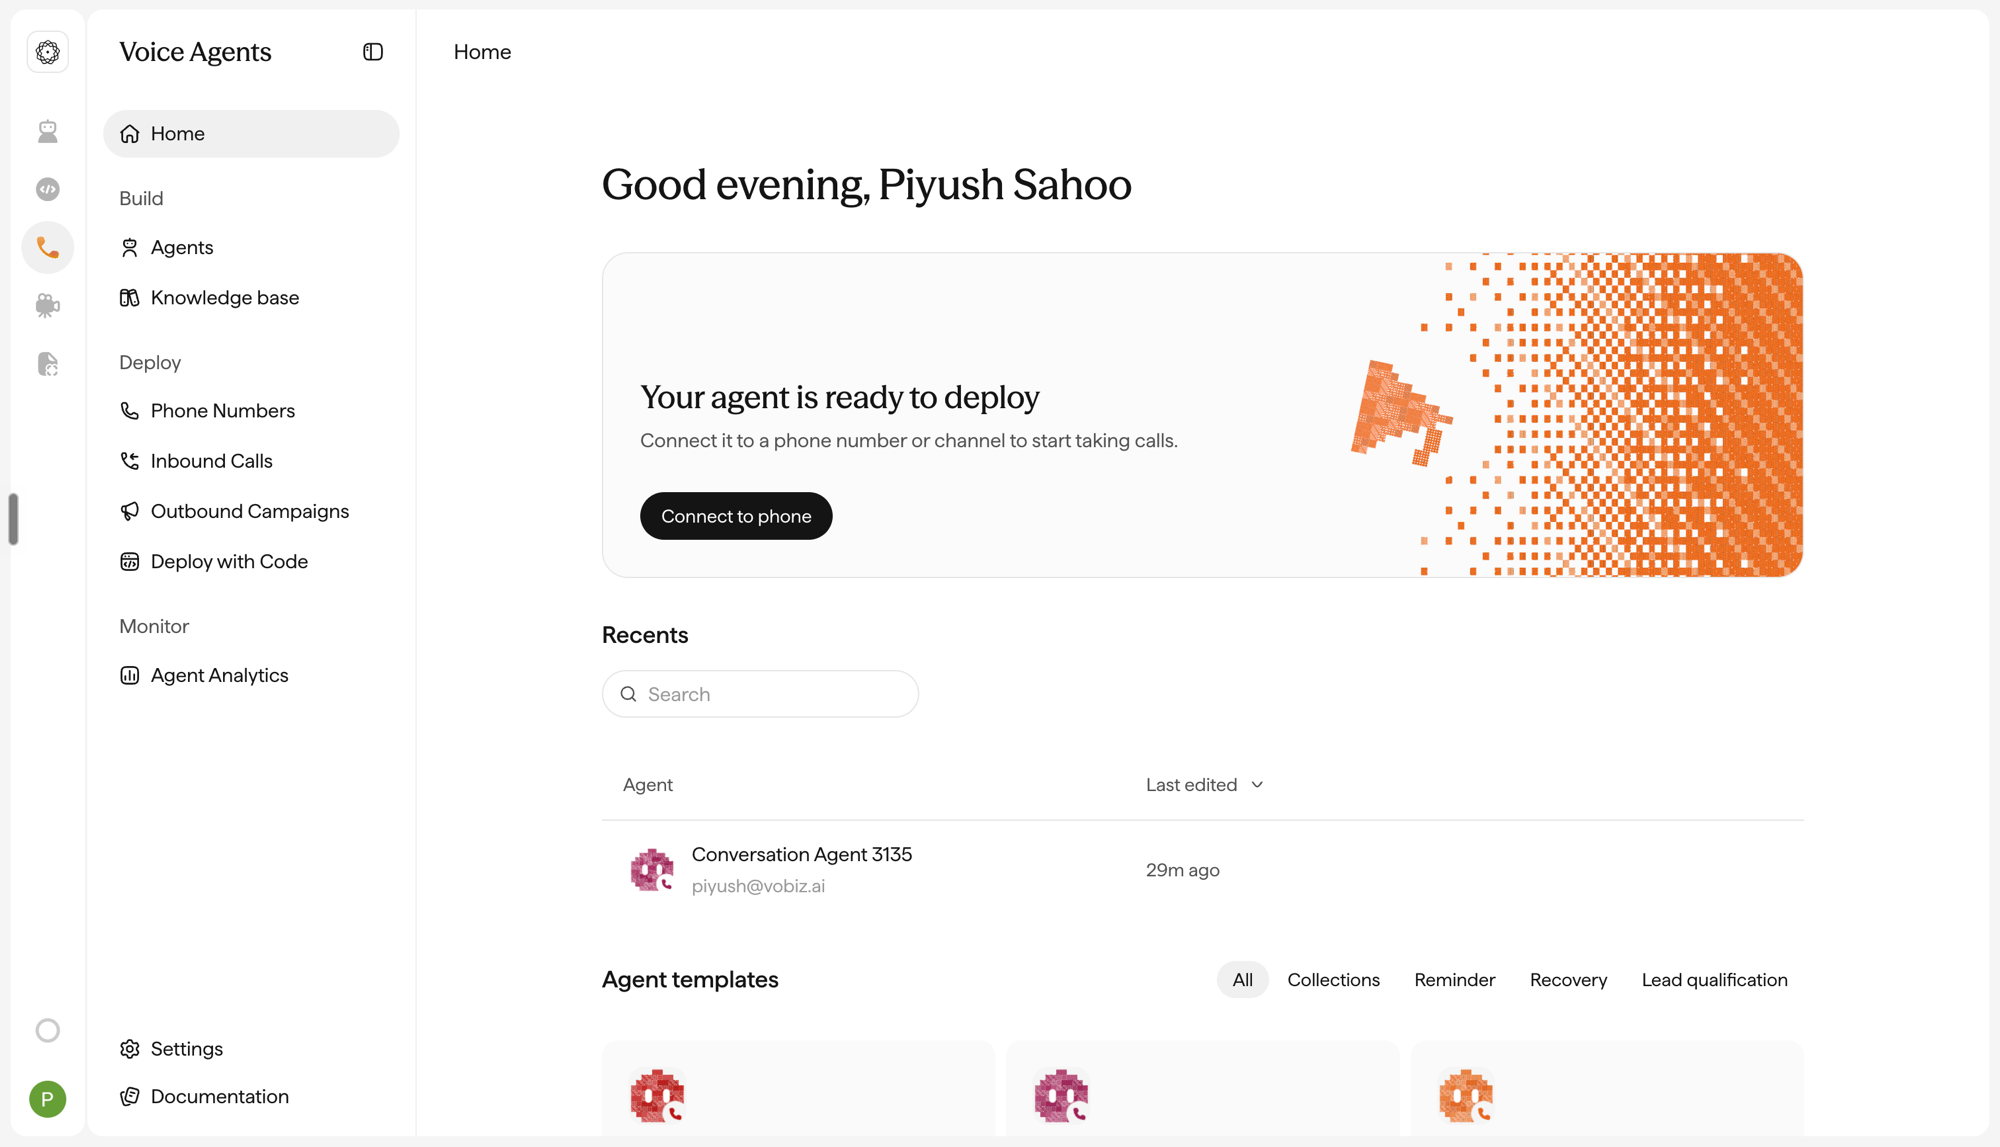
💡 Tip: Test the agent in the Sarvam playground before attaching a phone number. It's faster to iterate on the prompt there than over a live call.
Open the telephony section
Under Deploy, click Phone Numbers - or go straight to platform.sarvam.ai/samvaad/deploy/telephony.
The Take your agent live screen presents both telephony options.
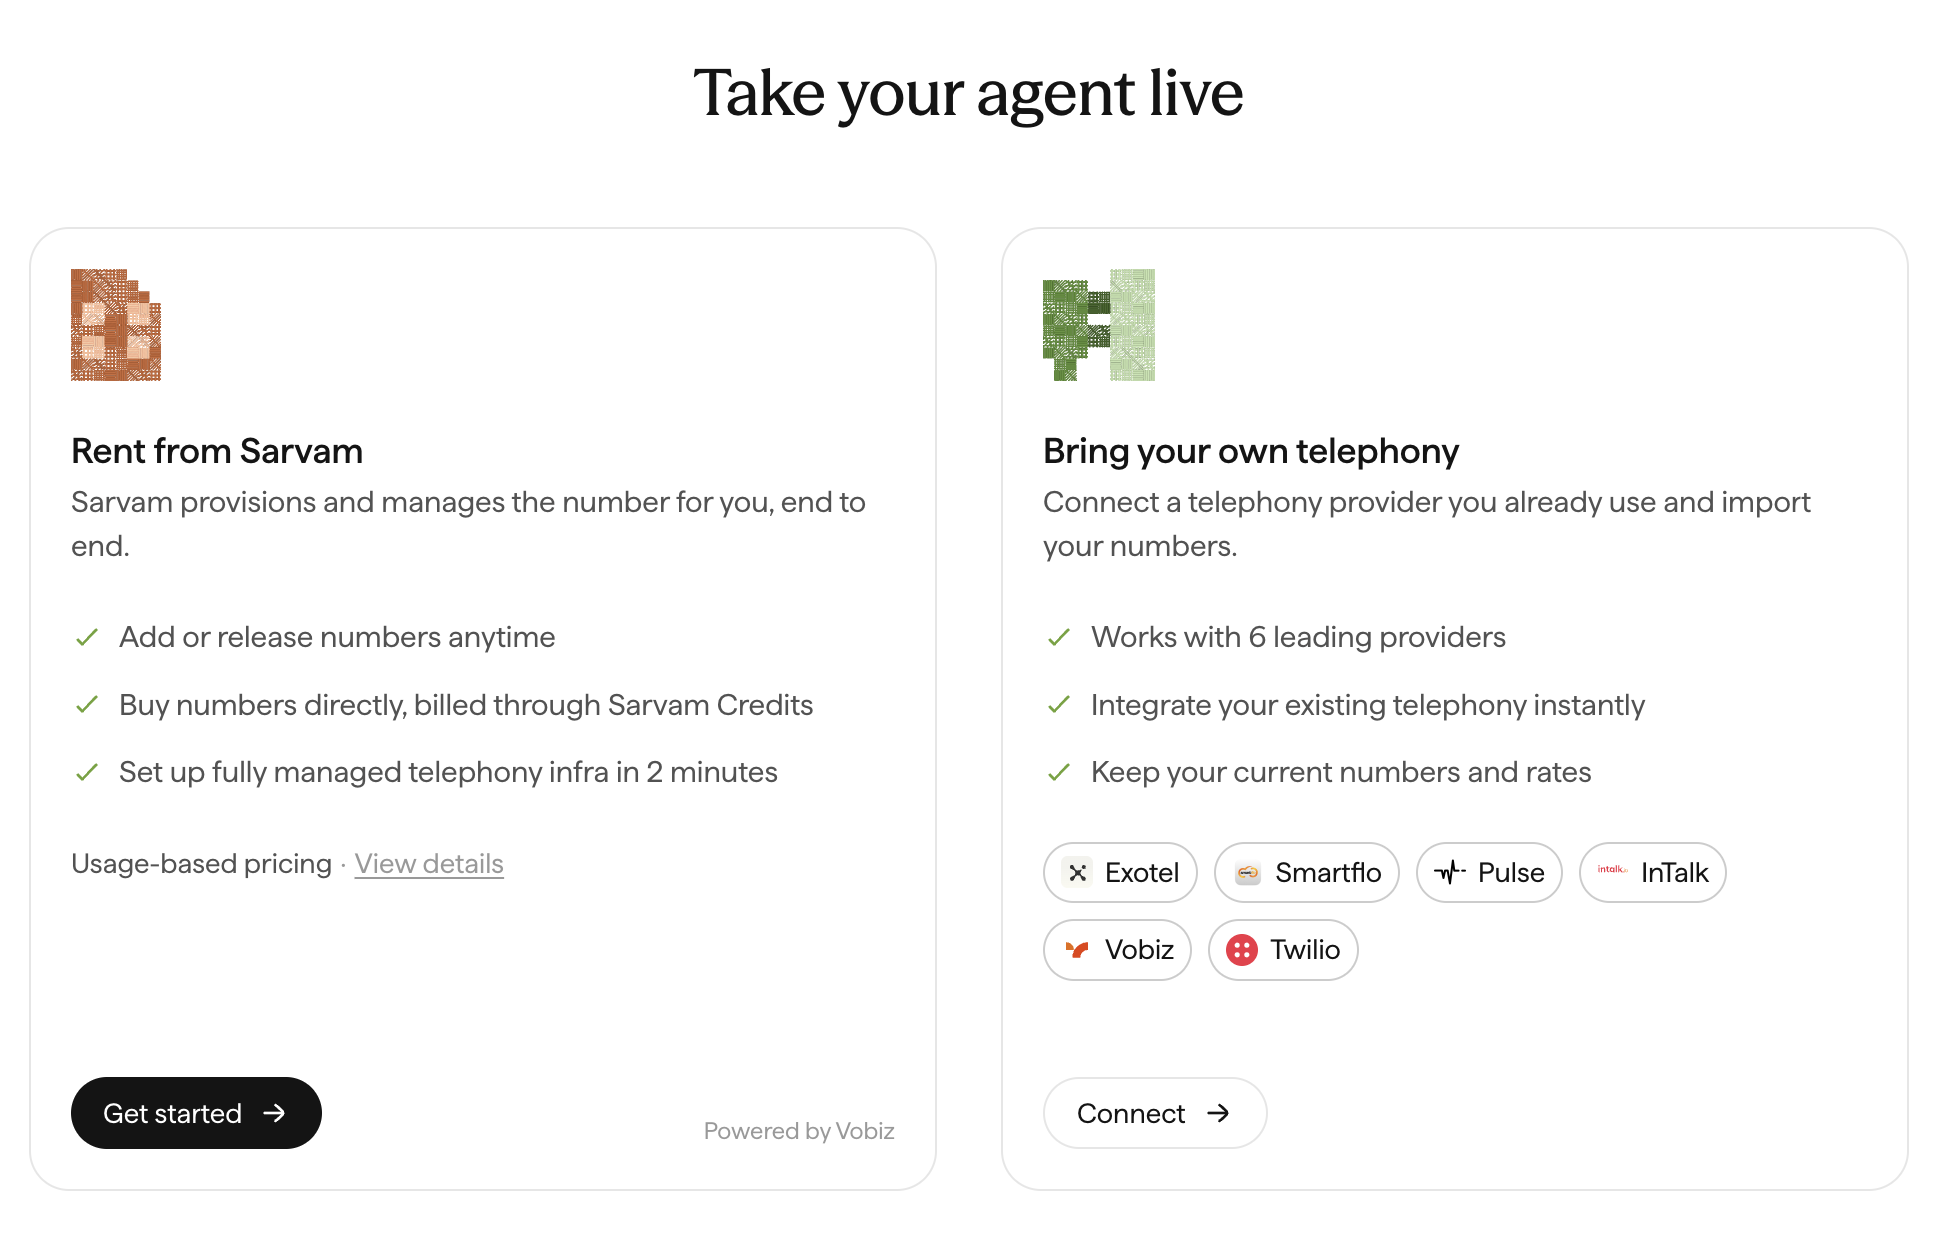
Click Get started on the Rent from Sarvam card. The Powered by Vobiz label at the bottom of that card is your telephony layer.
Select your business type
Indian phone numbers require KYC before they can be provisioned. Sarvam asks which kind of account you're verifying.
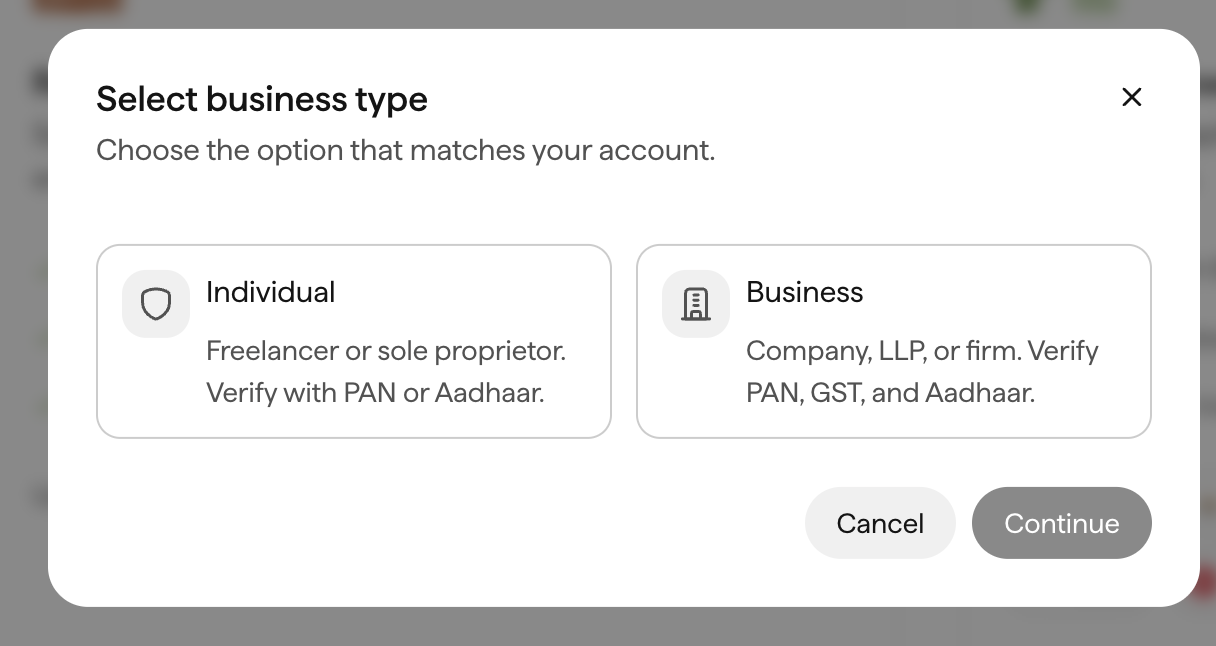
| Choose | If you are |
|---|---|
| Individual | A freelancer or sole proprietor |
| Business | A registered company, LLP, or firm |
Pick the option that matches your account and click Continue.
⚠️ Warning: Choose carefully - the verification path differs, and the documents you submit must belong to the entity that will own the number. A mismatch between the entity and the documents is the most common reason KYC comes back as failed.
Complete KYC on Vobiz
Sarvam redirects you to a Vobiz-hosted KYC session. It's a three-step flow - Type → Verify → Done.
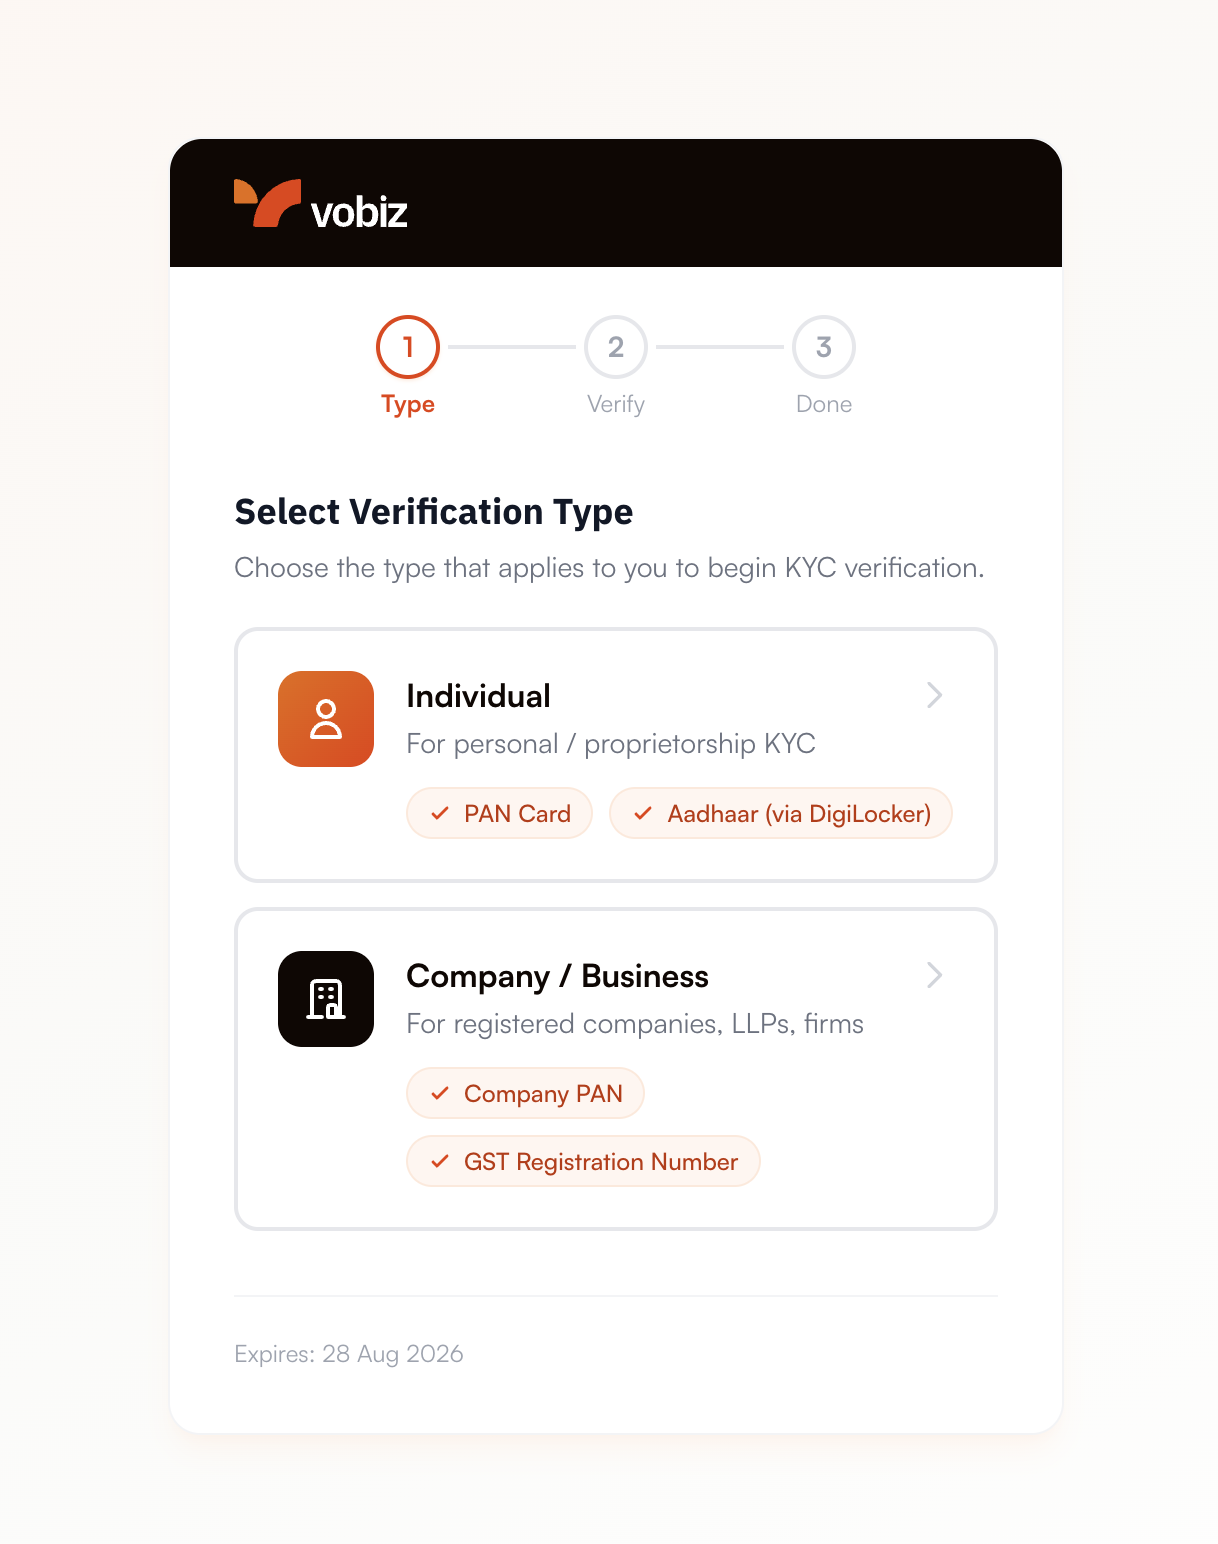
Confirm the verification type and submit the documents it asks for:
| Verification type | Documents required |
|---|---|
| Individual - personal or proprietorship | PAN Card, and Aadhaar via DigiLocker |
| Company / Business - companies, LLPs, firms | Company PAN, and GST Registration Number |
Aadhaar is verified through DigiLocker, so you consent in DigiLocker rather than uploading a scan. Nothing is keyed in by hand.
⚠️ Warning: The KYC link is time-limited - the expiry date is shown at the bottom of the session. If it lapses before you finish, return to the telephony section in Sarvam and start the flow again to get a fresh link.
When every document clears, you land on the confirmation screen and a confirmation email goes to the address on the account.
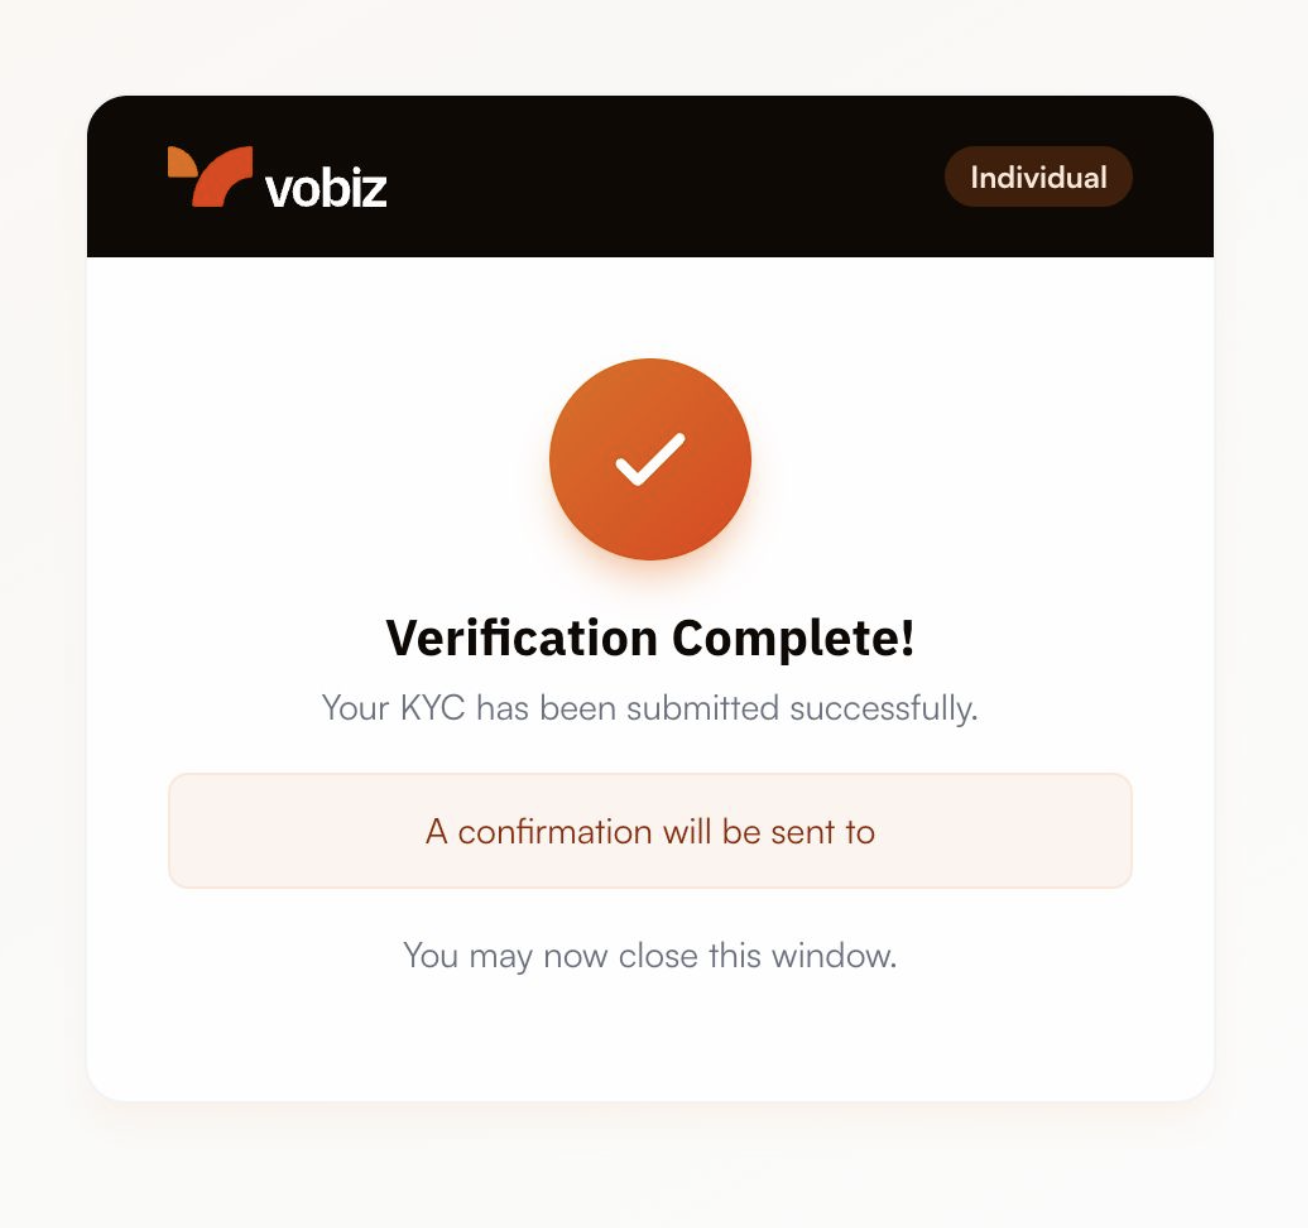
✅ Success: KYC is done. You can close the window and return to Sarvam - number provisioning is now unlocked.
ℹ️ Note: Verification is usually near-instant, but a document can land in a pending state while it's checked against the source registry. If provisioning is still blocked after a few minutes, refresh the telephony page before retrying. Background on how this works: Sub-Account KYC and KYC for India.
Buy a phone number
With KYC cleared, open the buy-number dialog from the Phone Numbers section and pick from the available inventory. Each row shows the number, its region, and the monthly fee.
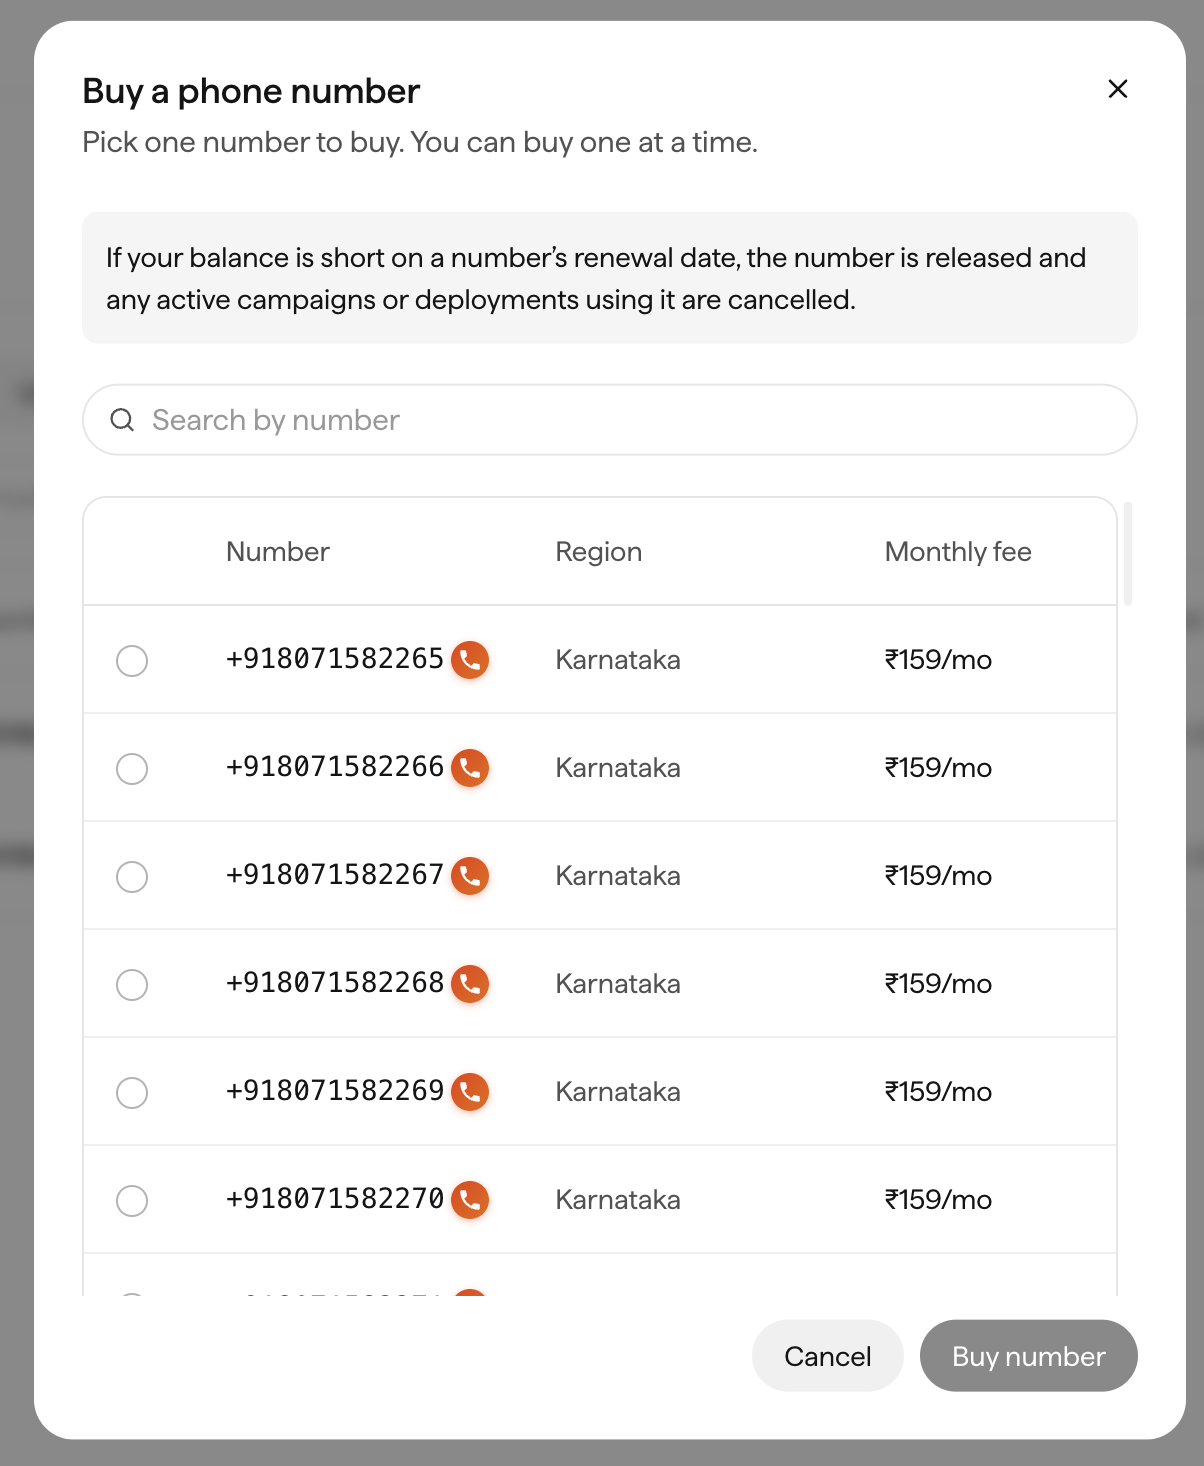
Select one number and click Buy number. You buy one number at a time - repeat the flow to add more.
⚠️ Warning: Keep enough Sarvam Credits to cover renewals. If your balance is short on a number's renewal date, the number is released and any active campaigns or deployments using it are cancelled.
💡 Tip: Numbers are searchable, so if you want a specific pattern or a memorable ending, use the search box rather than scrolling the list.
Launch an outbound campaign
Go to Deploy → Outbound Campaigns and create a campaign. Vobiz is already wired up, so the number you just bought is available immediately - no trunk setup, no credentials to paste.
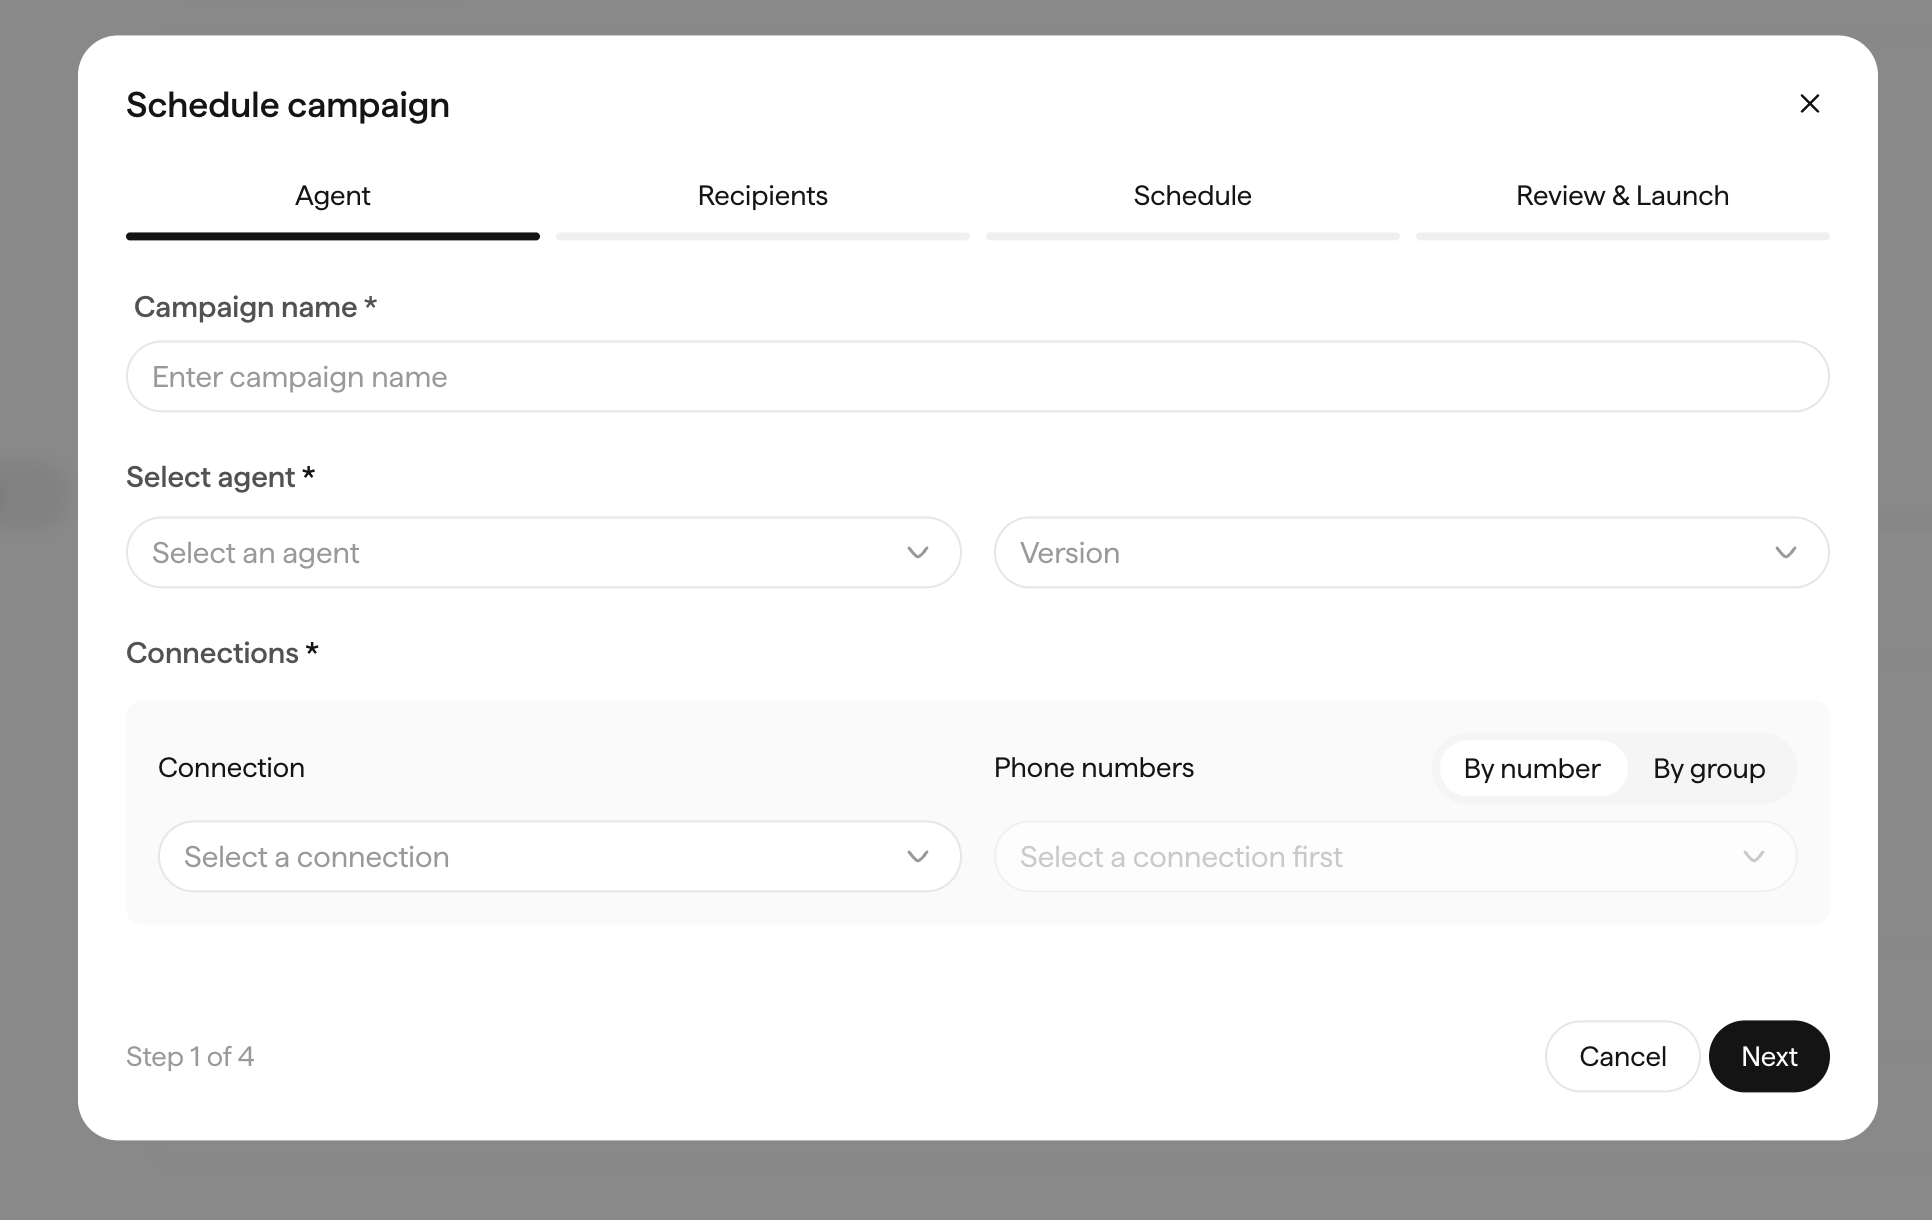
The wizard runs in four steps - Agent → Recipients → Schedule → Review & Launch. On the first step:
| Field | What to set |
|---|---|
| Campaign name | A label you'll recognise in Agent Analytics later |
| Select agent | The agent to run, plus the Version to pin |
| Connection | Your Vobiz-backed connection |
| Phone numbers | The caller IDs to dial from - By number or By group |
Then add recipients, set the schedule, review, and launch.
💡 Tip: Pinning an explicit agent Version means a later prompt edit can't change the behaviour of a running campaign. Bump the version deliberately when you want the new prompt live.
ℹ️ Note: For outbound calling in India, dial-rate pacing and number rotation have a real effect on connect rates and on how carriers treat your numbers. Worth reading before a large campaign: Number utilization, Number health, and UCC / DLT regulations.
Deploy an inbound agent
To have an agent answer calls, go to Deploy → Inbound Calls and create a deployment.
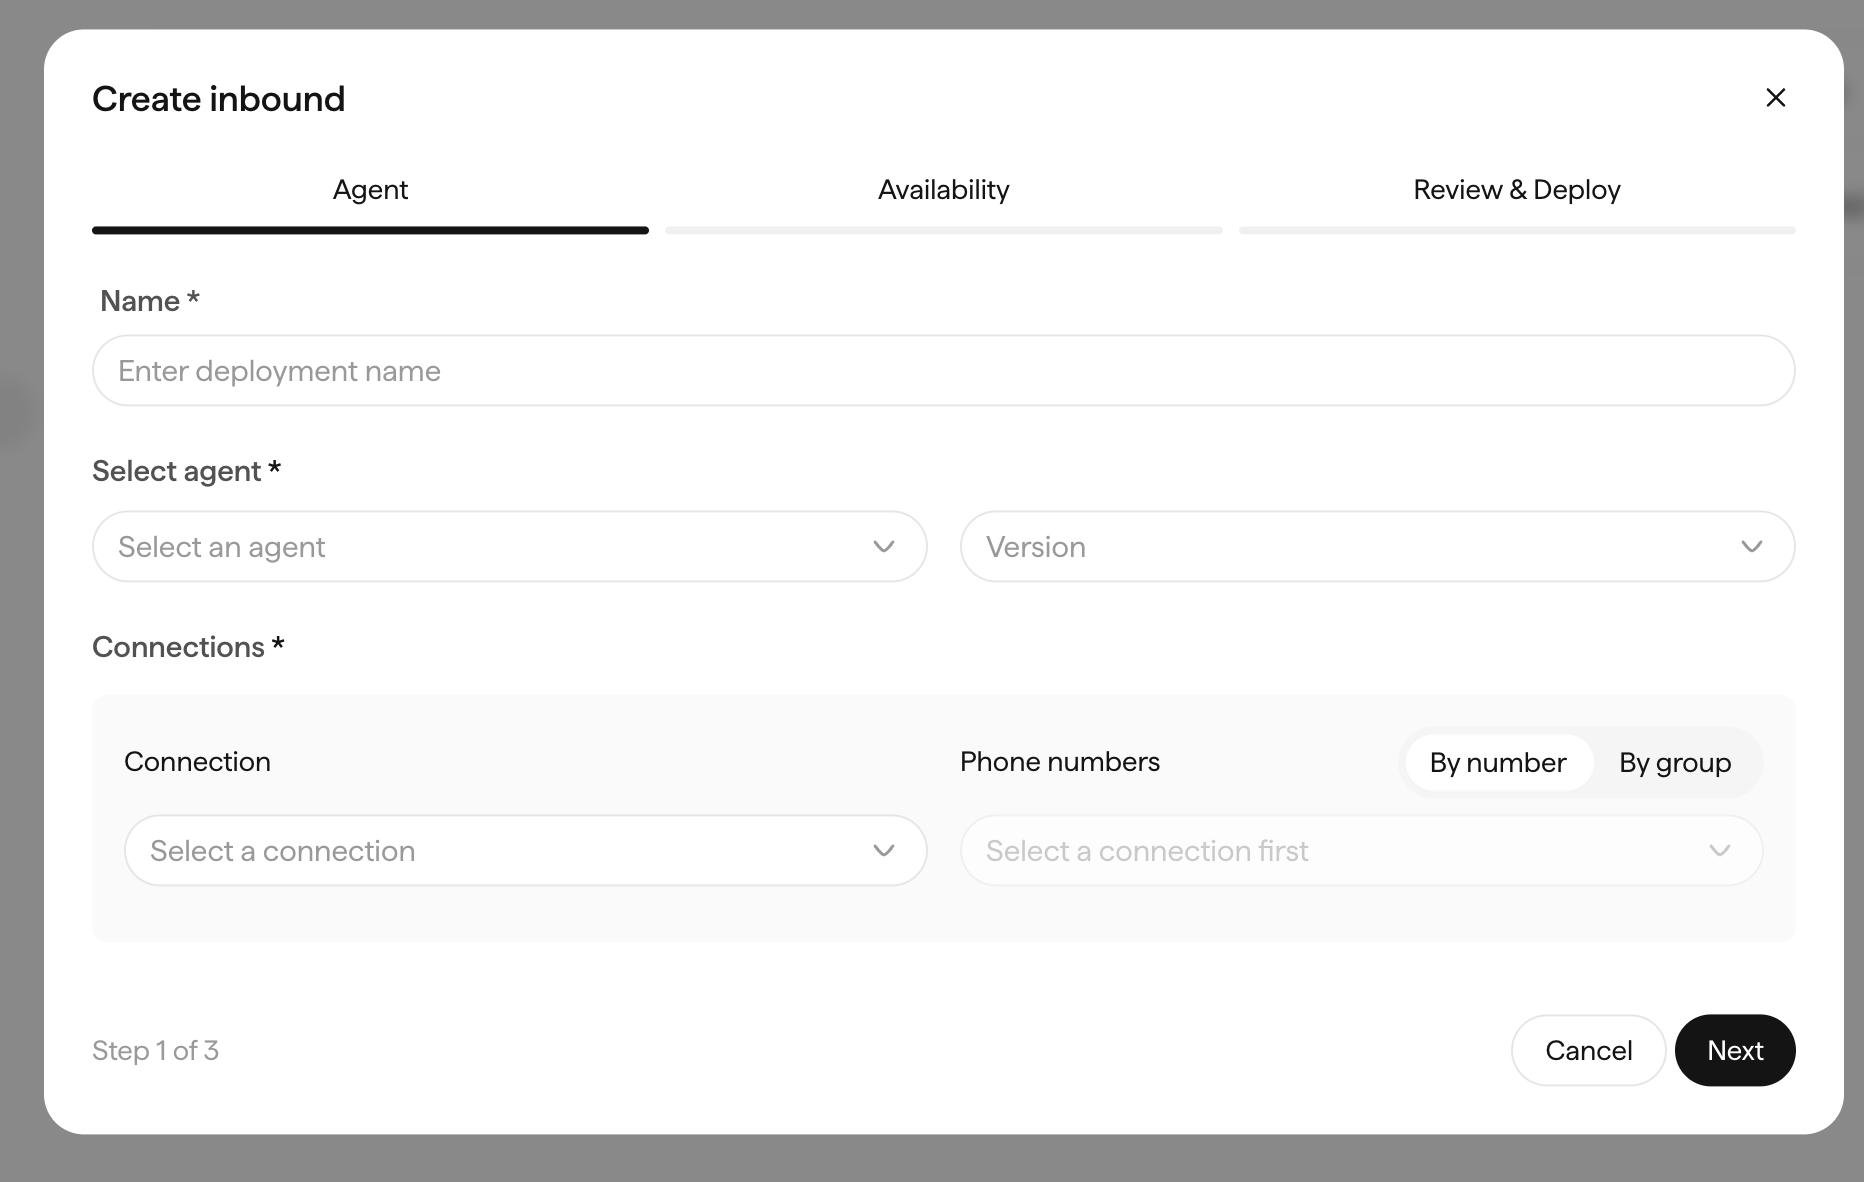
Three steps - Agent → Availability → Review & Deploy. Name the deployment, choose the agent and version, then attach the connection and the numbers that should reach it.
Availability sets the hours the agent answers, in a timezone you choose.
Once deployed, the detail view shows the live configuration and an Active badge:
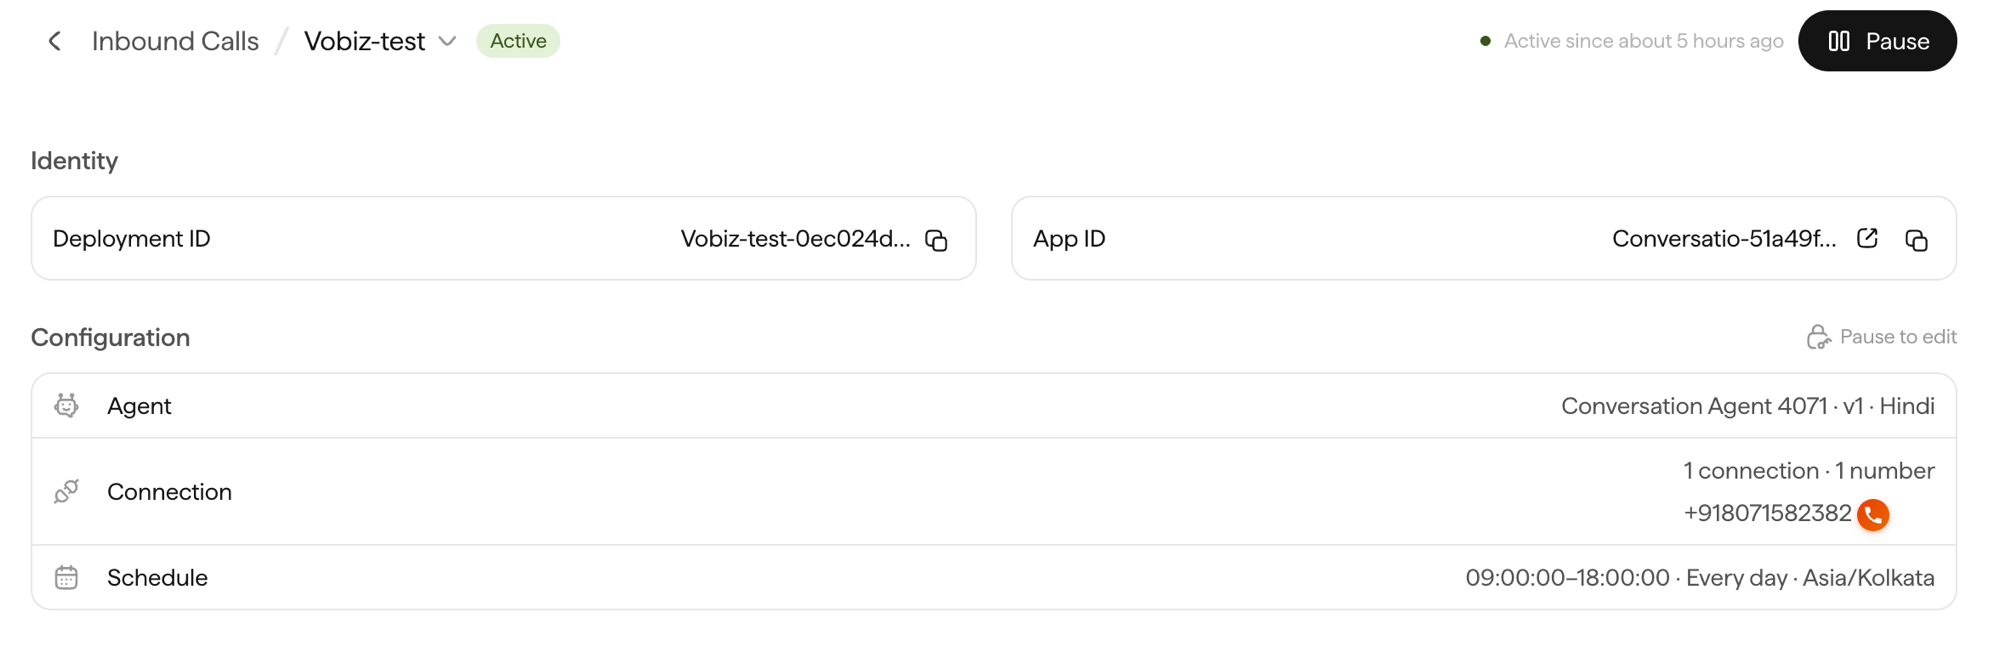
| Field | What it tells you |
|---|---|
| Deployment ID | The identifier for this inbound deployment |
| App ID | The underlying app backing it |
| Agent | Which agent, version, and language answers |
| Connection | The Vobiz connection and attached number |
| Schedule | Answering hours and timezone |
✅ Success: Call the number. Your agent picks up, and Vobiz carries the audio both ways.
💡 Tip: Configuration is locked while a deployment is Active. Hit Pause to edit it, then resume - so plan changes for a quiet window if the number is taking live traffic.
Connect an existing Vobiz account
Already have a Vobiz account with numbers on it? Use the Bring your own telephony path instead - you keep your existing numbers and rates, and billing stays with Vobiz rather than moving to Sarvam Credits. No KYC step here either, because your account is already verified.
On the Take your agent live screen, click Connect on the Bring your own telephony card, then choose Vobiz.
Get your credentials
The first tab points you at the two values Sarvam needs. Sign in to the Vobiz Console - your Auth ID and Auth Token are shown directly on the main dashboard.
| Credential | Looks like | Where |
|---|---|---|
| Auth ID | MA_XXXXXXXX | Vobiz Console dashboard |
| Auth Token | A long secret string | Vobiz Console dashboard |
⚠️ Warning: Treat your Auth Token like a password - anyone holding both values can act on your account. Full detail in API authentication.
Enter the details
On the Enter details tab, paste both values and name the connection.
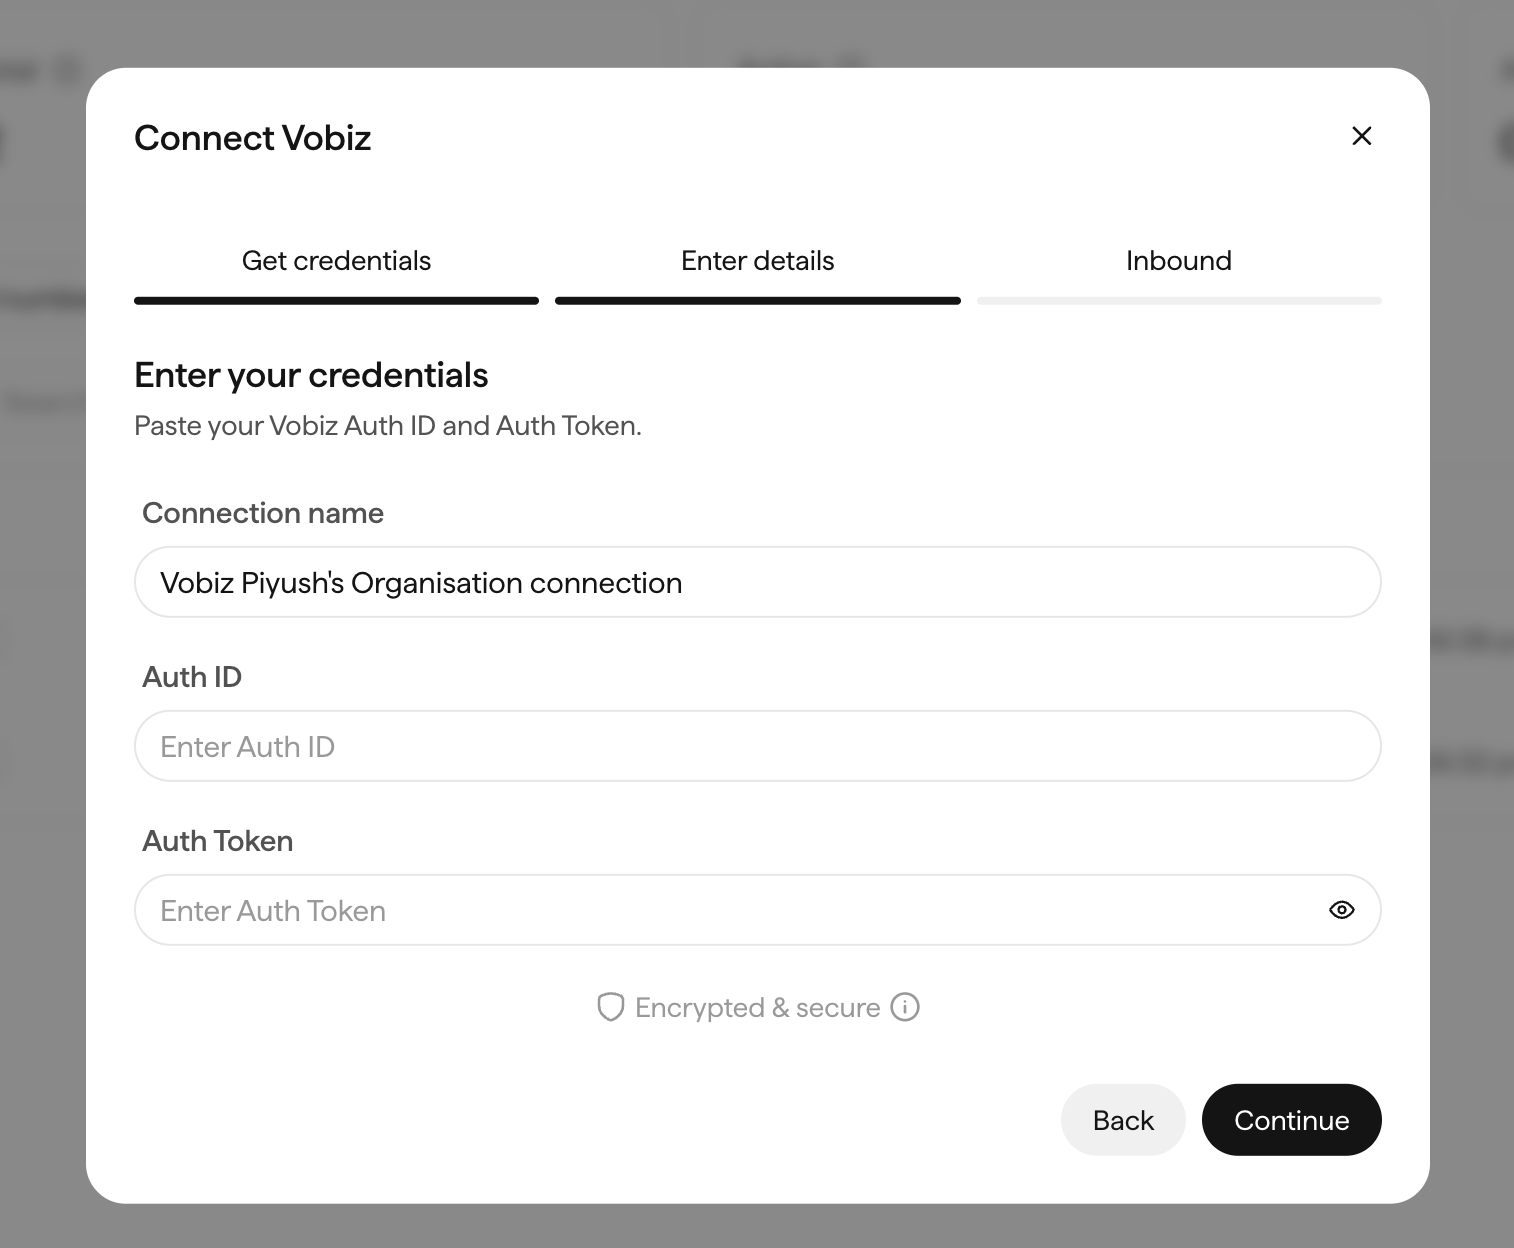
| Field | What to enter |
|---|---|
| Connection name | A label for this connection. Sarvam pre-fills one from your organisation name - keep it, or rename it if you'll connect more than one Vobiz account |
| Auth ID | Your account Auth ID |
| Auth Token | Your account Auth Token. Use the eye toggle to check for stray whitespace before continuing |
Credentials are stored encrypted. Click Continue.
💡 Tip: Running separate Vobiz accounts for staging and production? Give each connection a name that says which is which - the connection picker in the campaign and inbound wizards shows only this label.
Configure inbound
The final tab sets up inbound so calls arriving on your Vobiz numbers reach a Sarvam agent. Complete it to finish the connection.
✅ Success: The connection is live. Your Vobiz numbers now appear in the Phone numbers picker when you create an outbound campaign or an inbound deployment - steps 7 and 8 above.
💡 Tip: Don't have an account yet? Create one, then see Buy a phone number for provisioning in the Vobiz Console. Once numbers are on the account, they show up in Sarvam's number picker.
ℹ️ Note: Both paths deliver calls over the same Vobiz network. The difference is purely commercial - who provisions the number and who bills you for it.
Monitoring your calls
Sarvam's Monitor → Agent Analytics covers agent-level behaviour: conversations, outcomes, and transcripts.
For the telephony layer - what the carrier did with each call - Vobiz records a Call Detail Record per call, including a hangup cause that explains exactly why a call ended. That's the layer to check when a call never connected, dropped early, or reached voicemail instead of a person.
Resources
| Resource | Link |
|---|---|
| Sarvam platform | platform.sarvam.ai |
| Sarvam telephony section | Deploy → Telephony |
| Sarvam documentation | docs.sarvam.ai |
| KYC requirements for India | Compliance → KYC |
| Number best practices | Number utilization |
| Vobiz support | support@vobiz.ai |
Explore More Integrations
3CX integration
Connect 3CX PBX to Vobiz SIP trunking for inbound and outbound calling across 130+ countries - configure a generic SIP trunk in minutes.
Agora Integration
Connect an Agora Conversational AI agent to Vobiz SIP trunking - add a Vobiz number to Agora for outbound campaigns and route inbound calls to your agent, including India and 130+ countries.
Bolna integration
Bolna ships Vobiz as a built-in telephony provider. Paste two credentials into the Providers screen and your agents place and answer calls on numbers in 130+ countries, reaching 190, with audio streaming rather than a SIP trunk.
We use cookies to run this site and, with your permission, to understand how it's used. Read our Cookie Policy.